Guide
Create Github Repo
Overview
Creating a GitHub repository establishes a central, cloud-hosted location for your project code and collaboration. GitHub is a platform where developers share code, contribute to open source, and automate workflows. A repository acts as the remote storage for your project, enabling team collaboration, version control, and integration with tools like GitHub Actions. This workflow walks you through the GitHub web interface to set up a new repository with initial configuration—choosing visibility (public or private), adding a README for project documentation, selecting a .gitignore template to exclude unnecessary files, and applying a license to define how others can use your code.
Before you begin
- A GitHub account. If you don't have one, create an account at https://github.com by following the sign-up prompts.
- Be logged into GitHub at github.com before starting.
- Know the name and optional description you want for your repository.
- Understand your visibility preference: choose Private if only you or invited collaborators should access the repository, or Public if you want it visible to everyone.
Watch the recording
Step by step
Switch to or open your browser tab to access GitHub. This ensures you have a clear browser window ready to interact with the GitHub website.
Navigate to github.com in your browser. This takes you to GitHub's main interface where you can access repository creation tools.
Repository name*Click the Repository name field (marked with a red asterisk as required). This field is where you enter the name of your new repository.
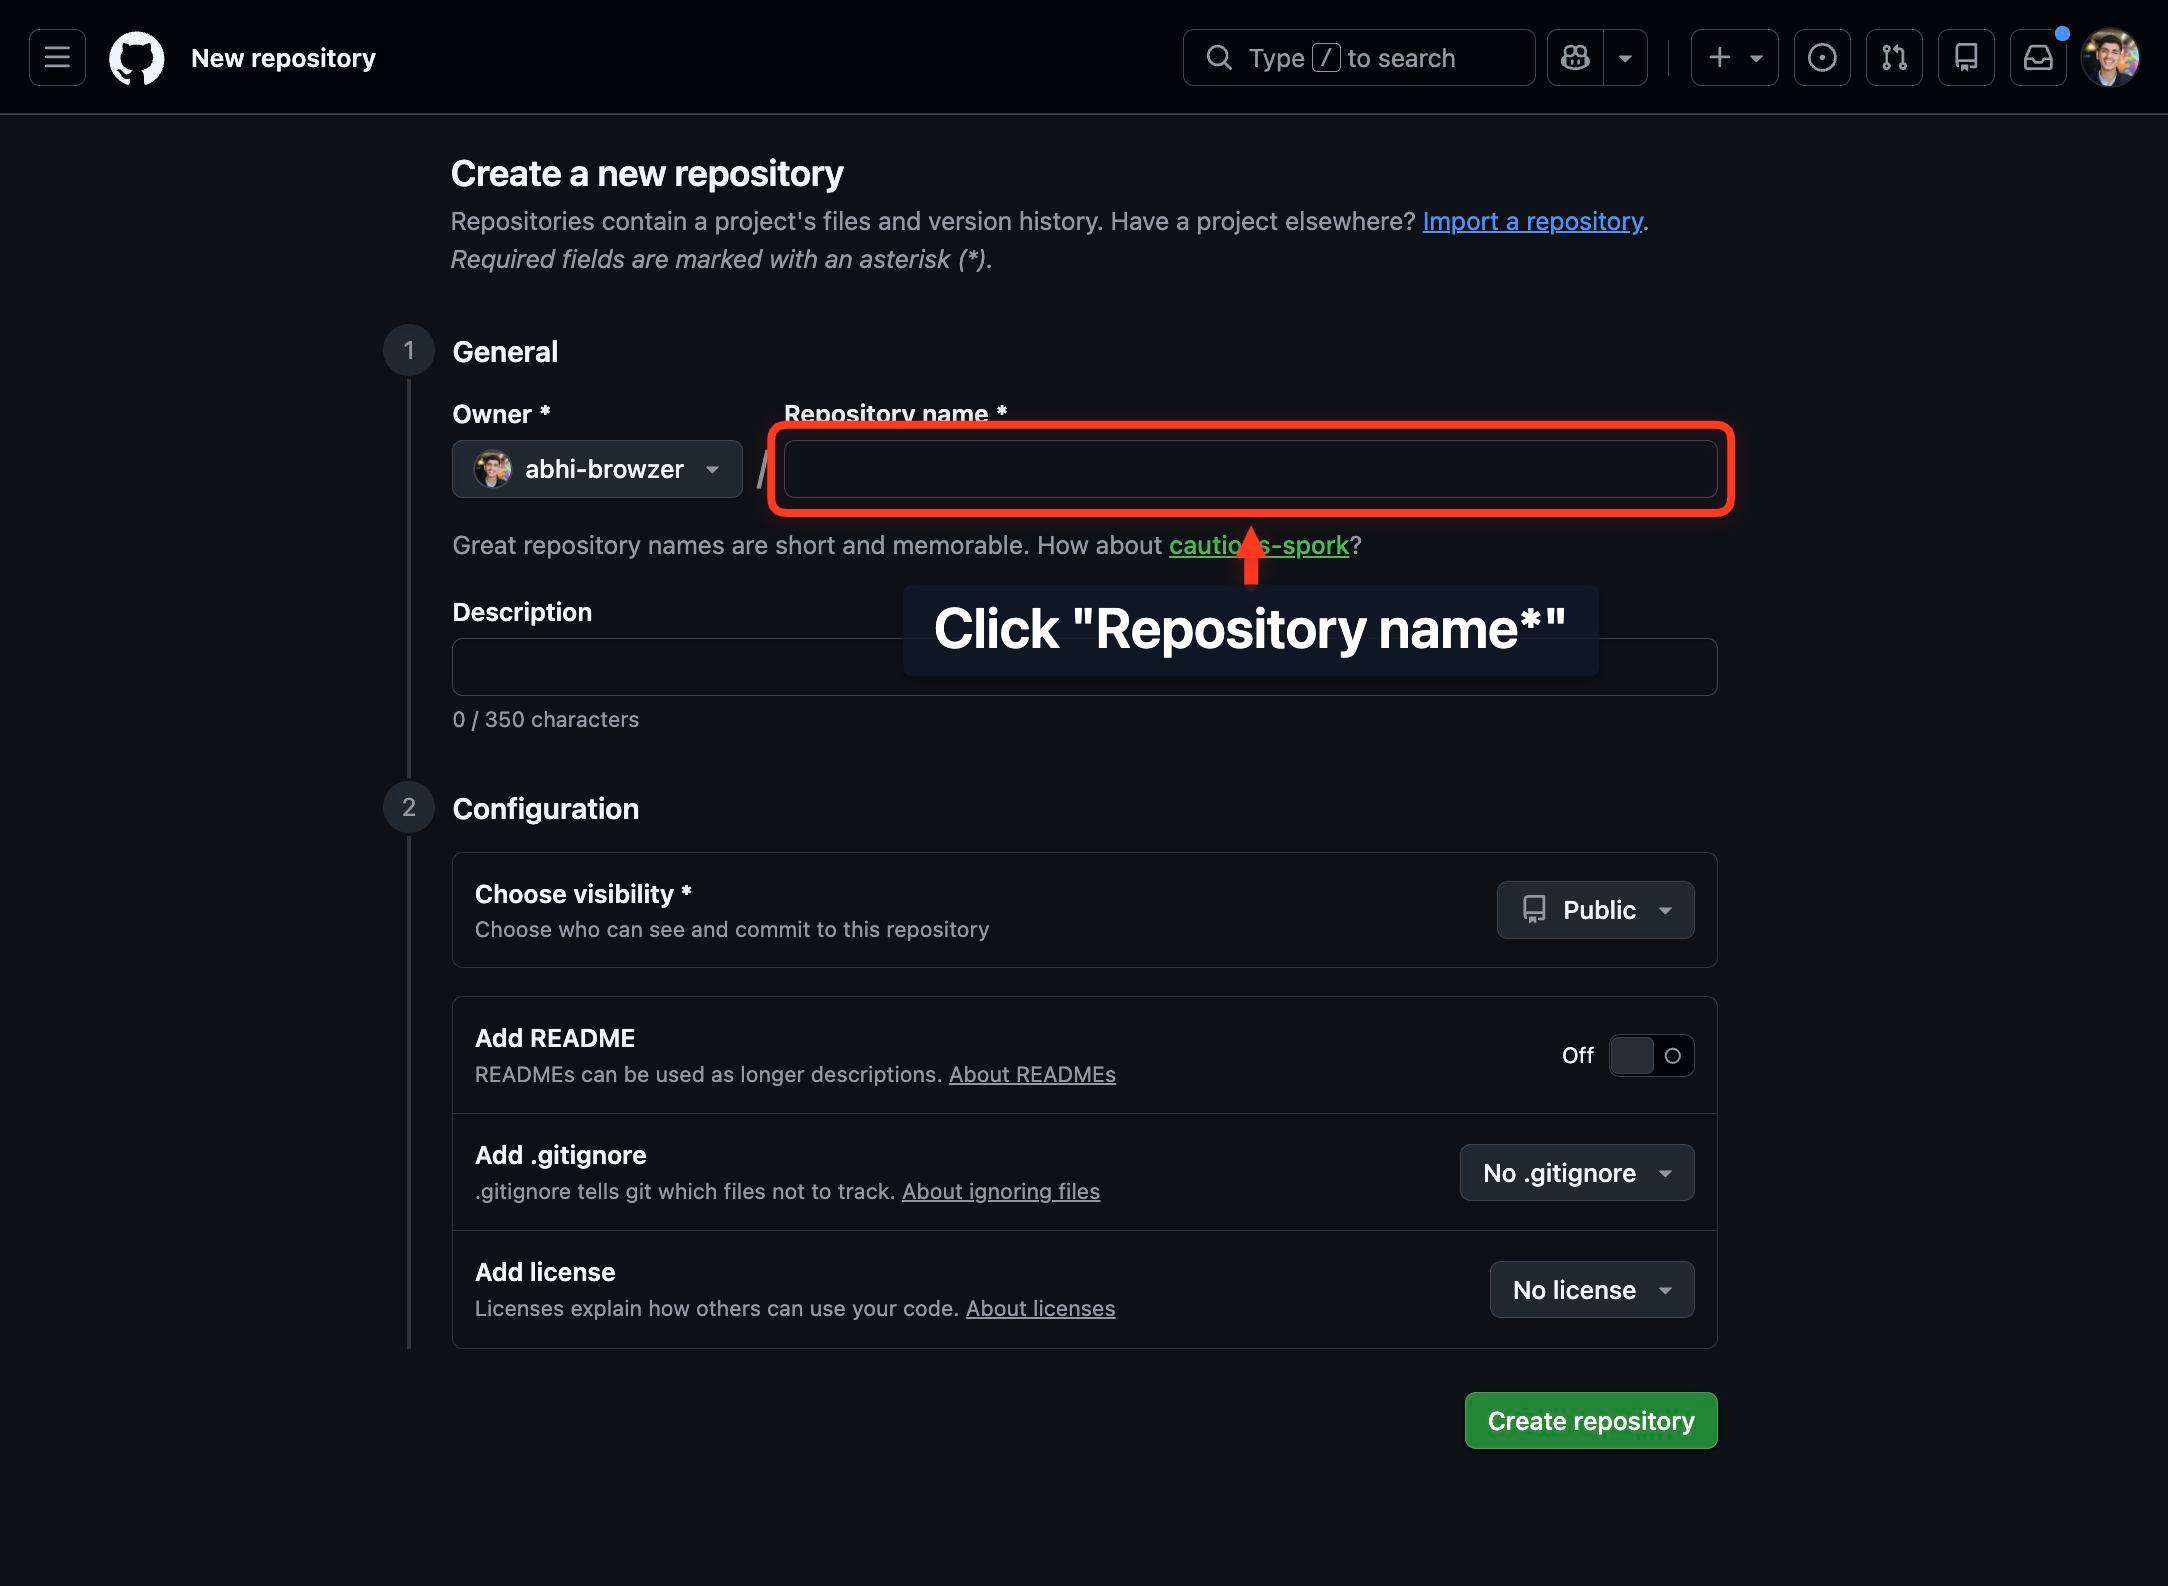
Repository name*Type your chosen repository name into the Repository name field. This is the public identifier for your project on GitHub.
DescriptionClick the Description field to enter a brief summary of your repository's purpose. This is optional but recommended, as it helps others (and your future self) understand the project's intent.
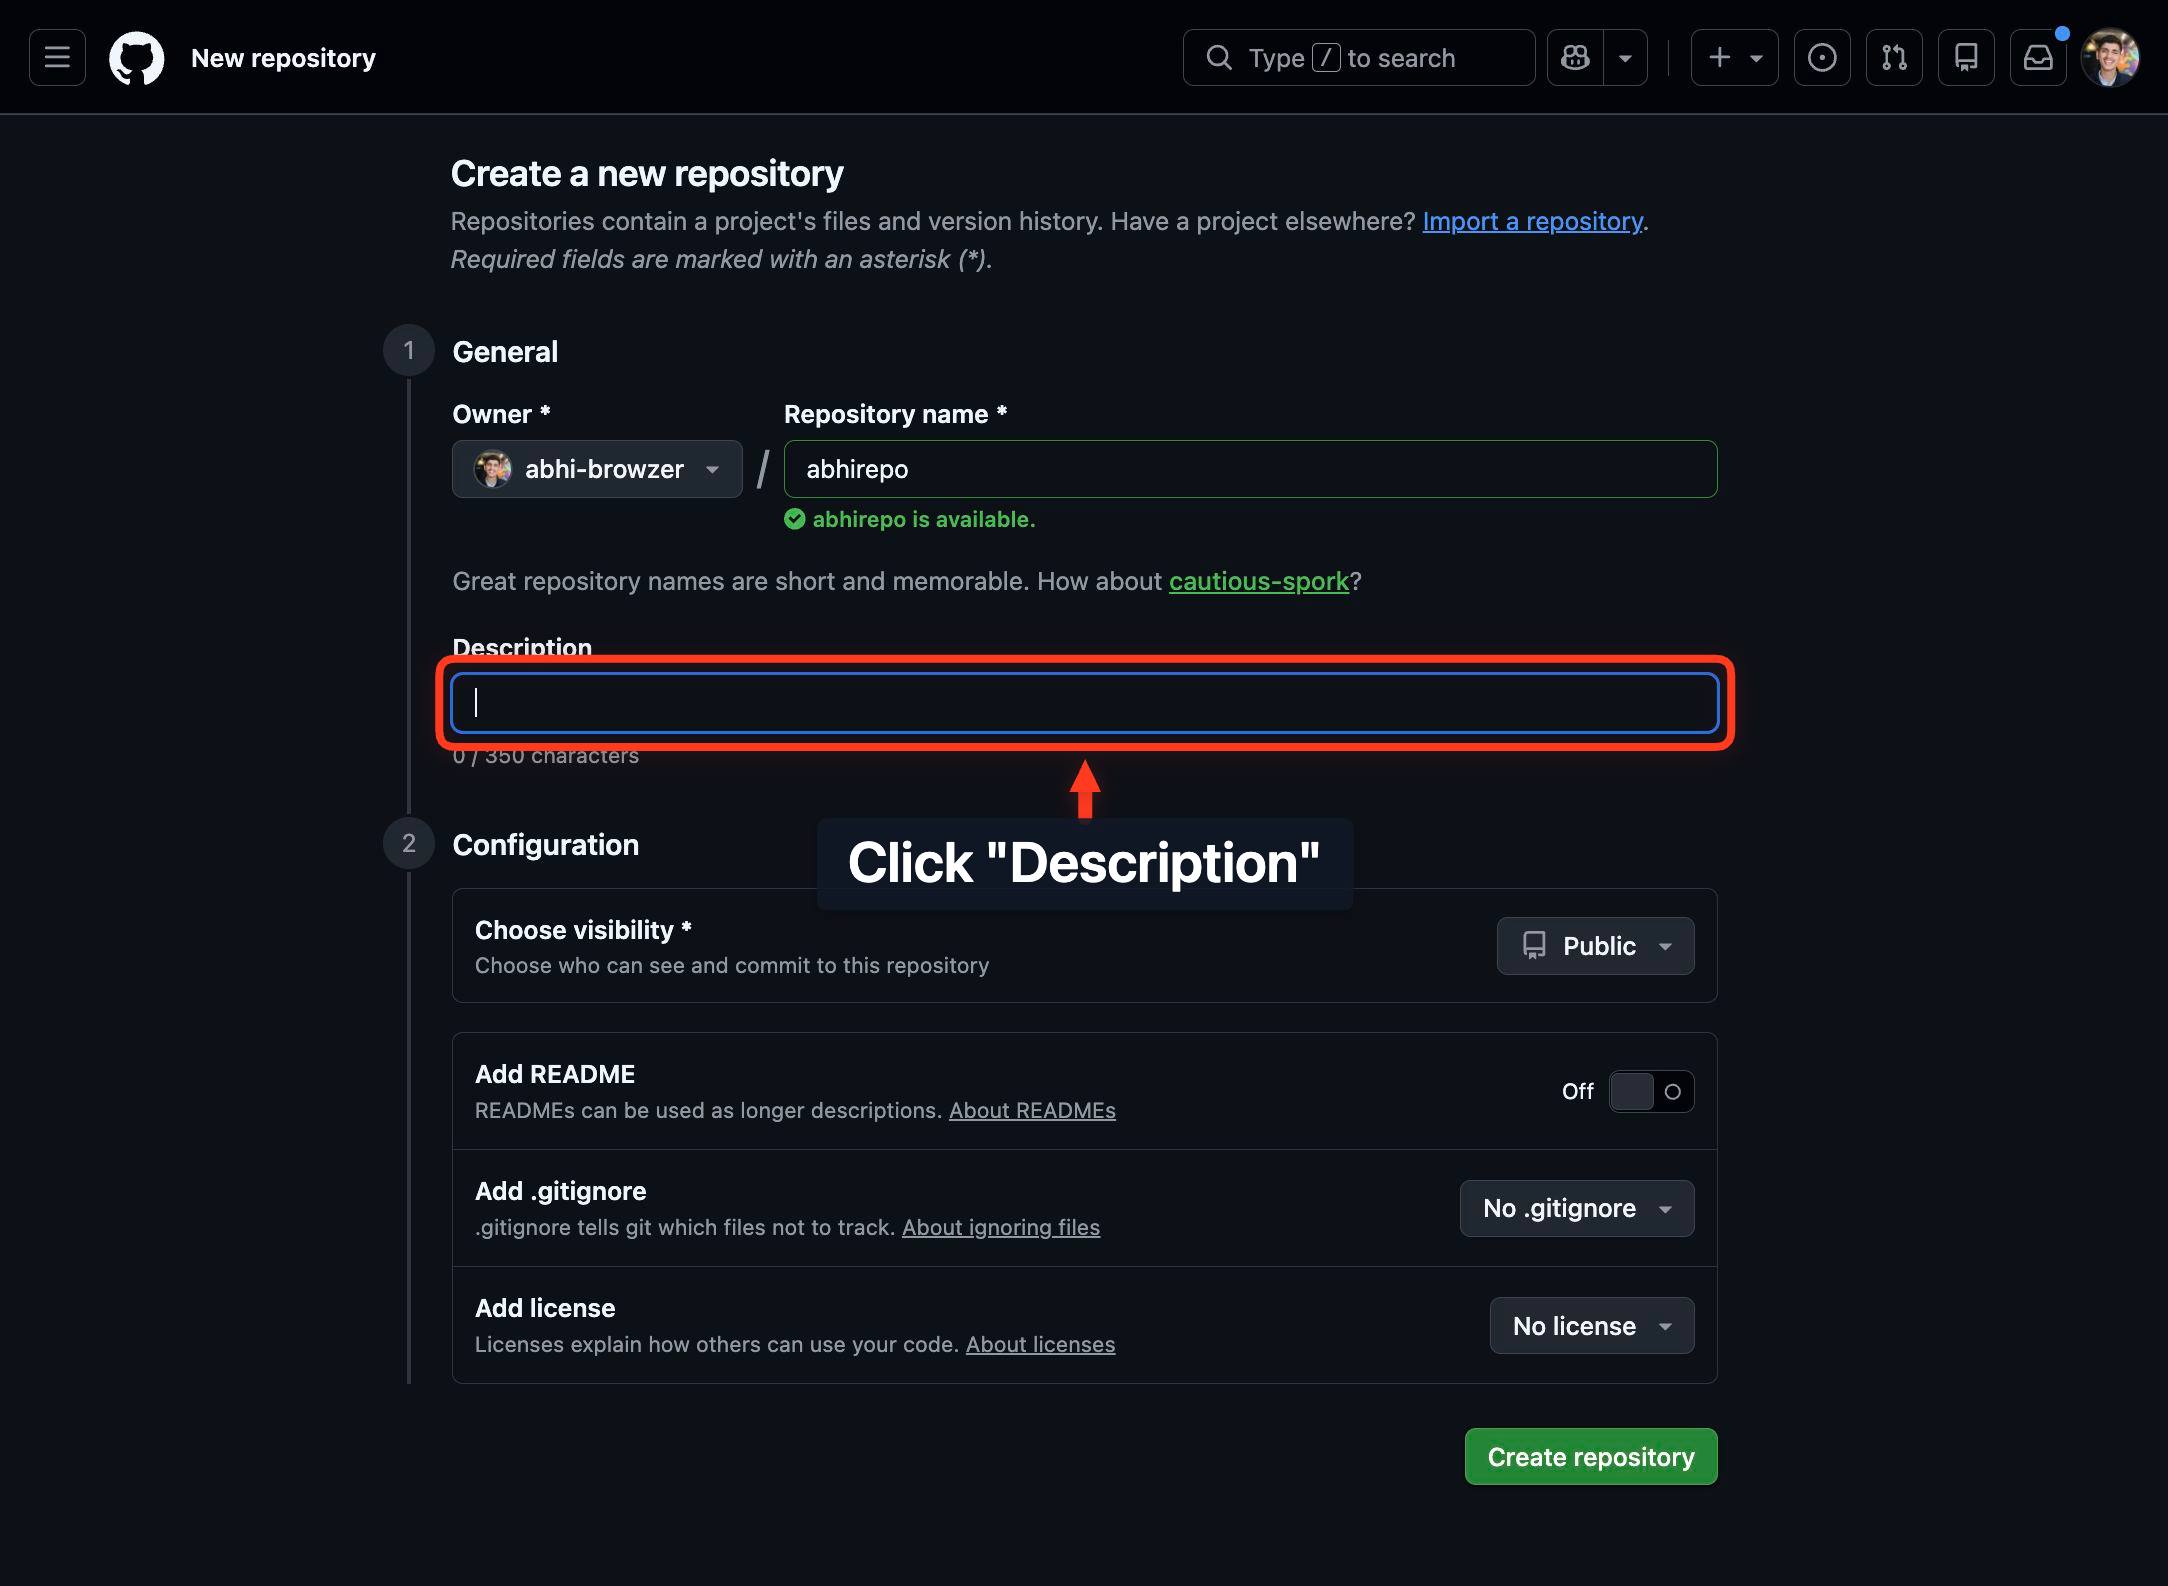
DescriptionType a description for your repository (e.g., 'A mobile app for tracking fitness goals' or 'Utilities for data processing'). This description appears on your repository's main page and in search results.
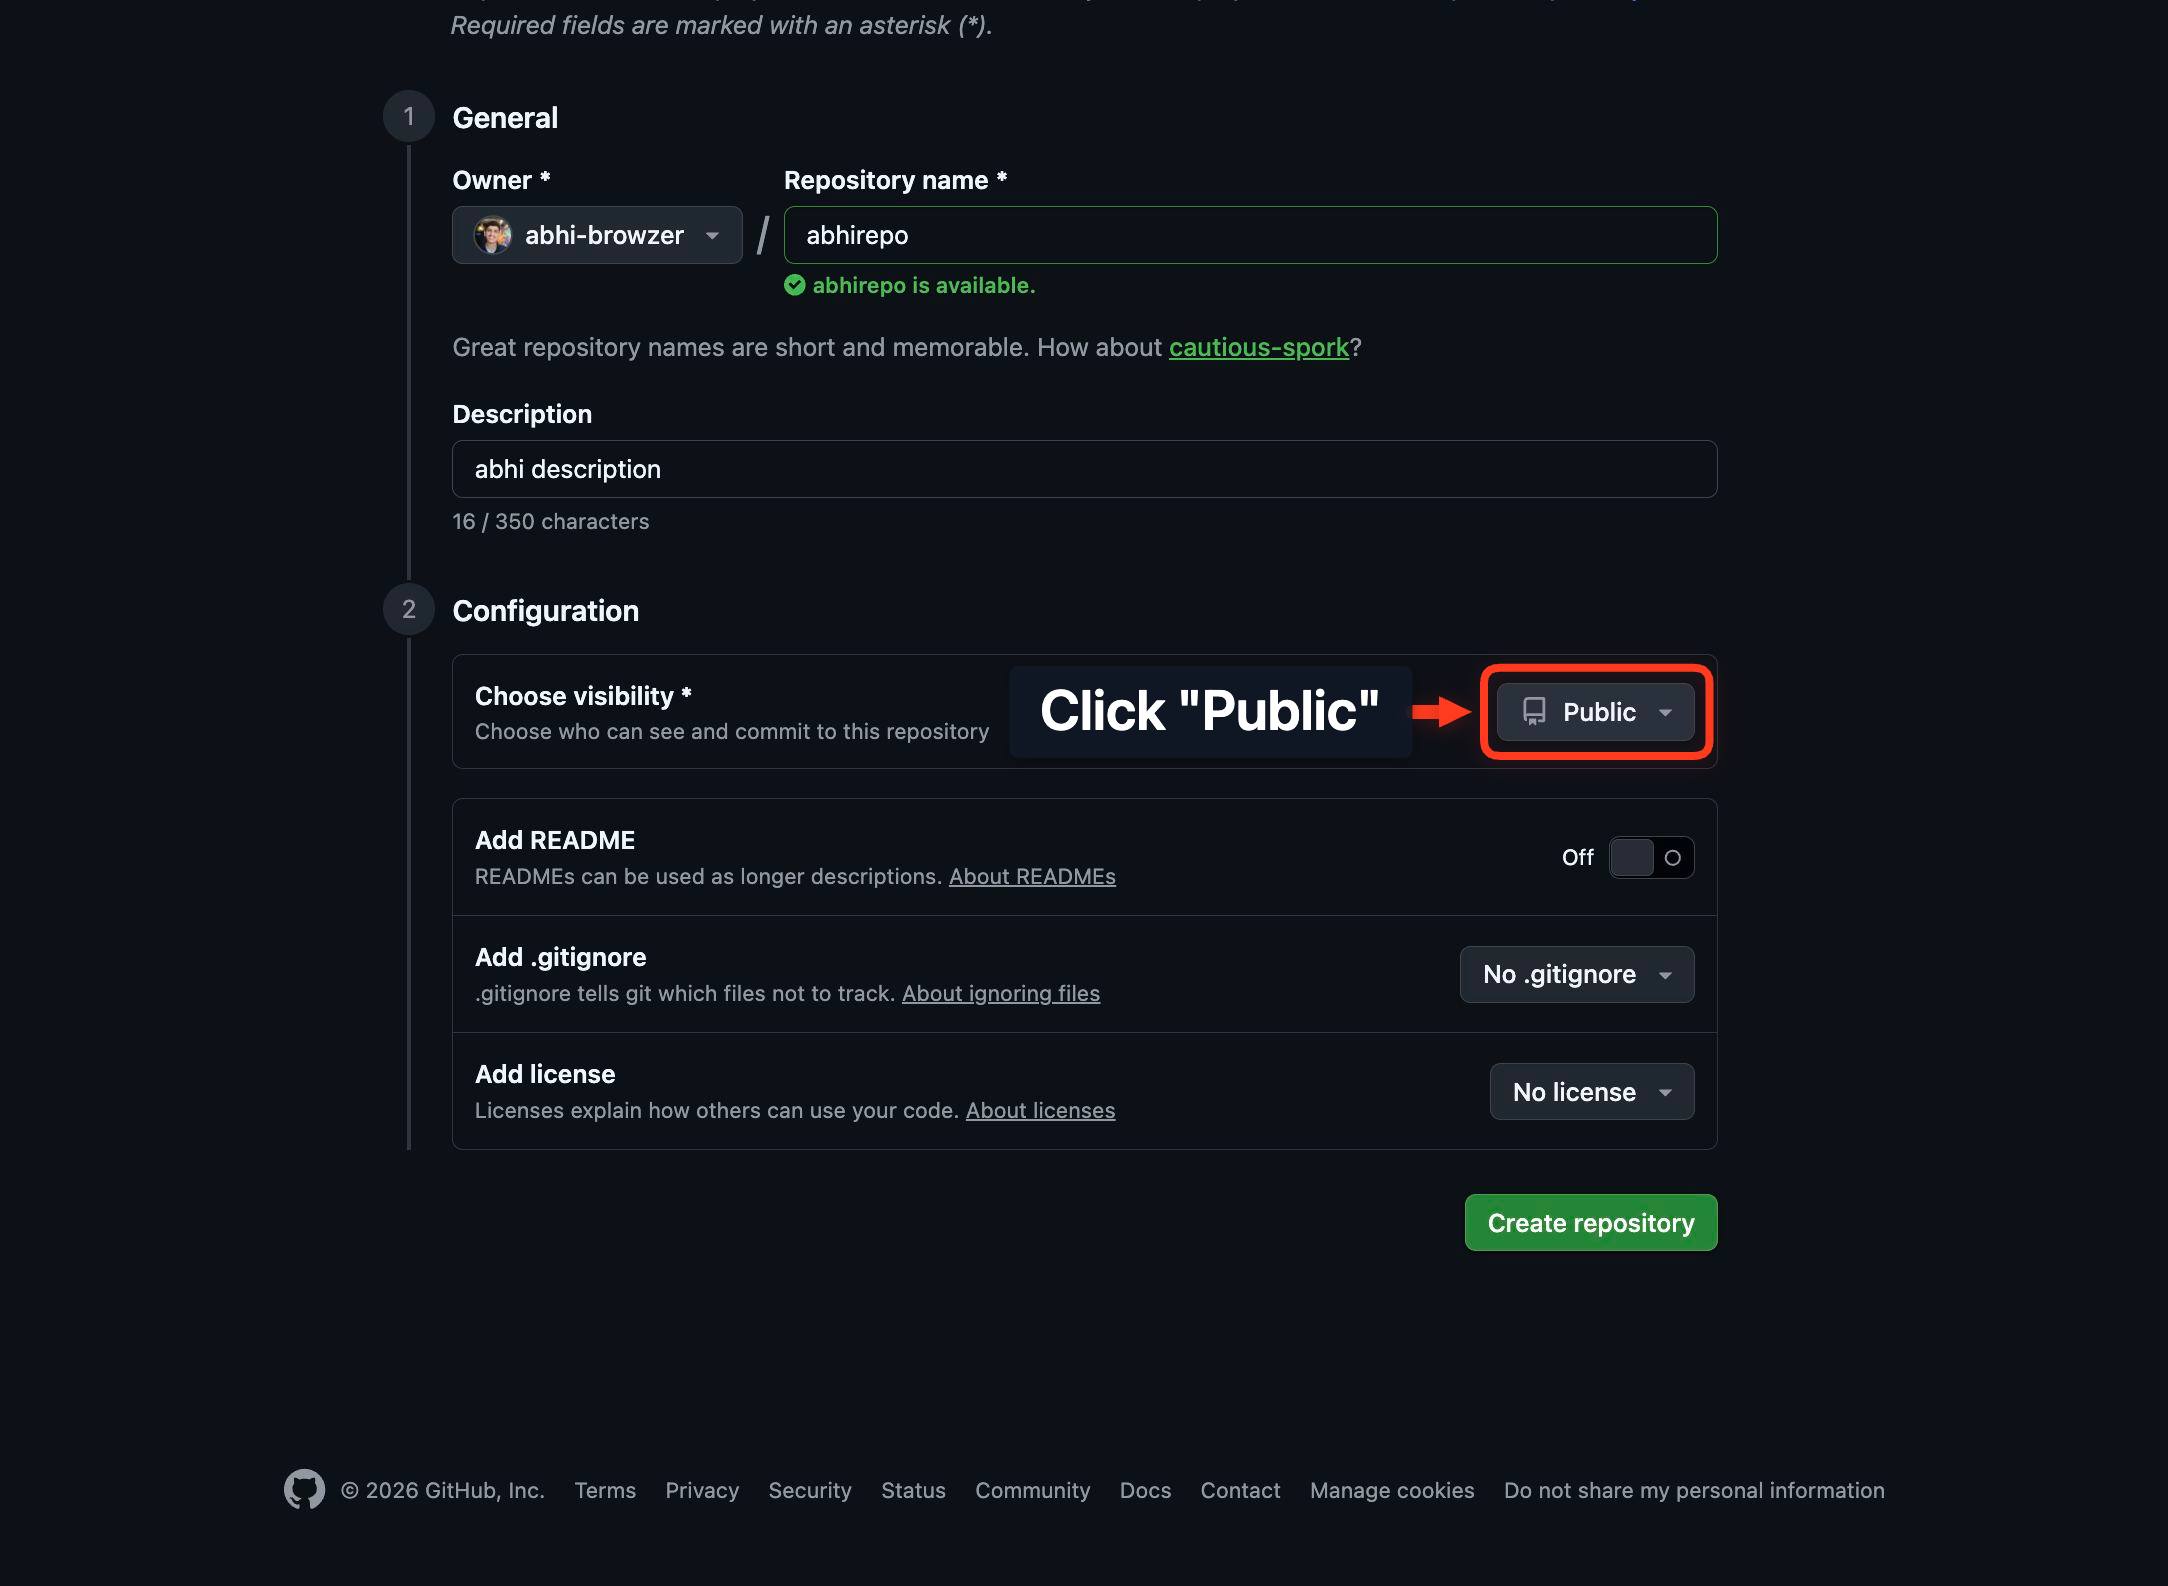
PublicClick the Public button to view visibility options. By default, Public is selected; clicking it opens a menu to switch to Private if desired.
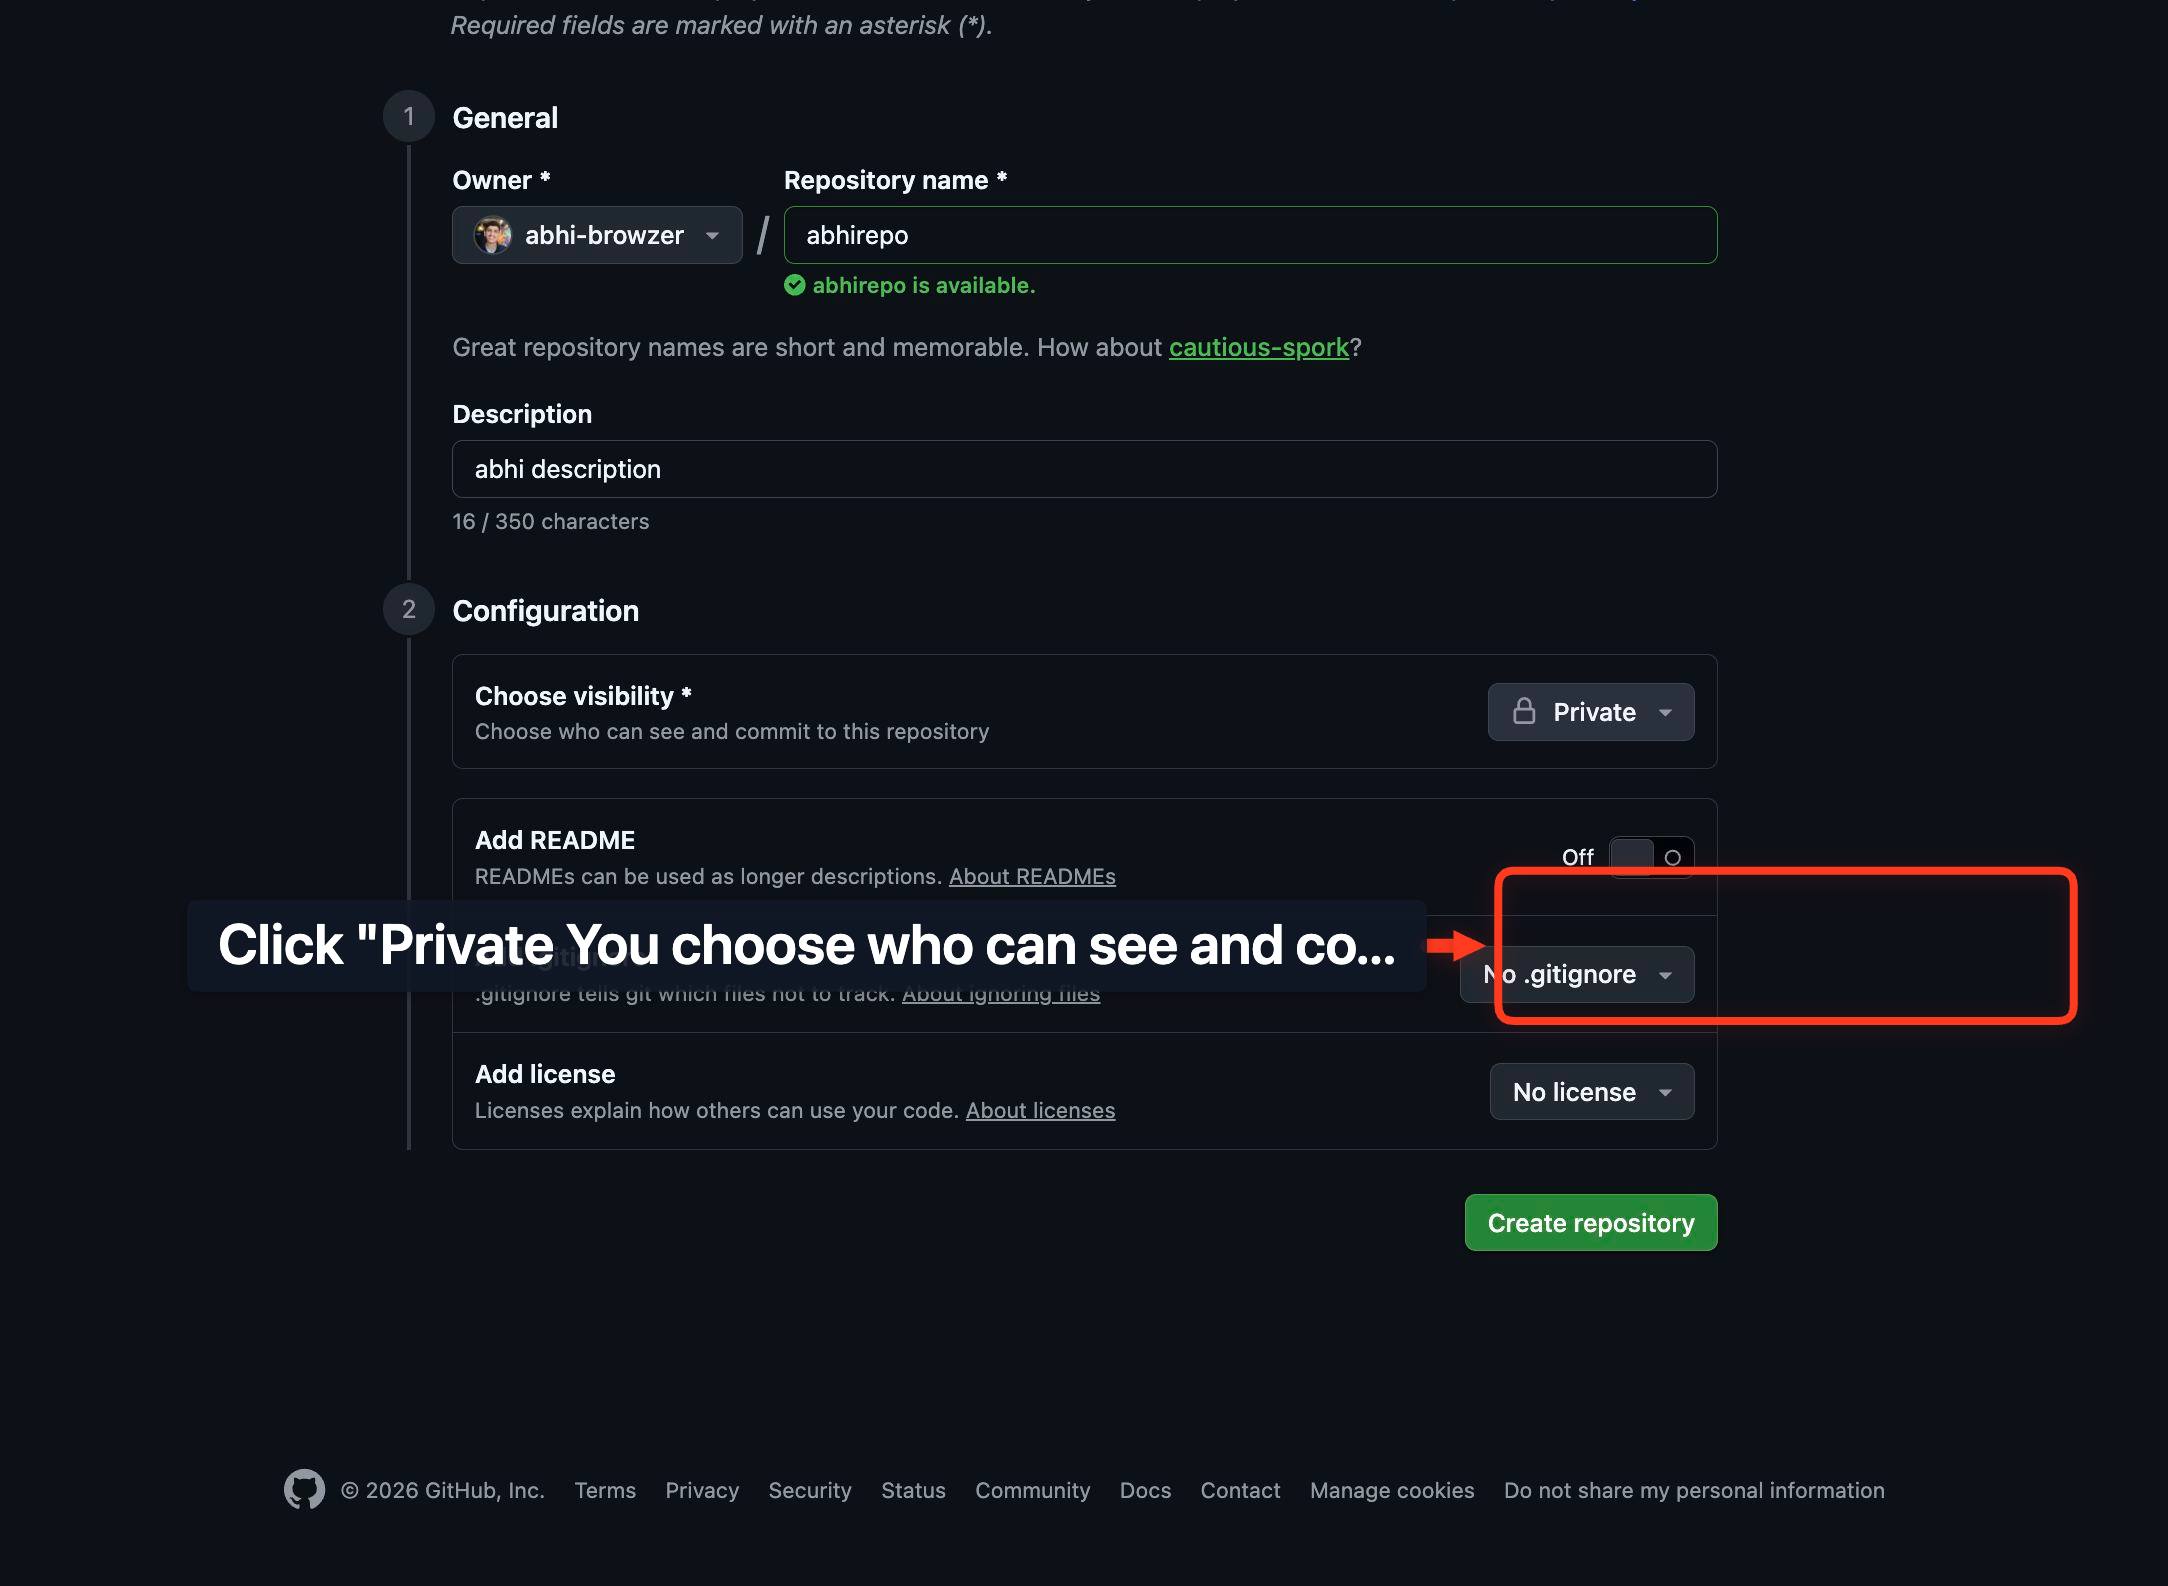
Private You choose who can see and commit to this repository.Click the Private option from the menu to restrict your repository to you and invited collaborators. Choose this if your code is confidential or not ready for public sharing. Public repositories are visible to anyone on GitHub.
Add READMEClick the Add README button to create a README.md file in your repository. A README is the first file visitors see and typically explains what your project does, how to use it, and how to contribute.

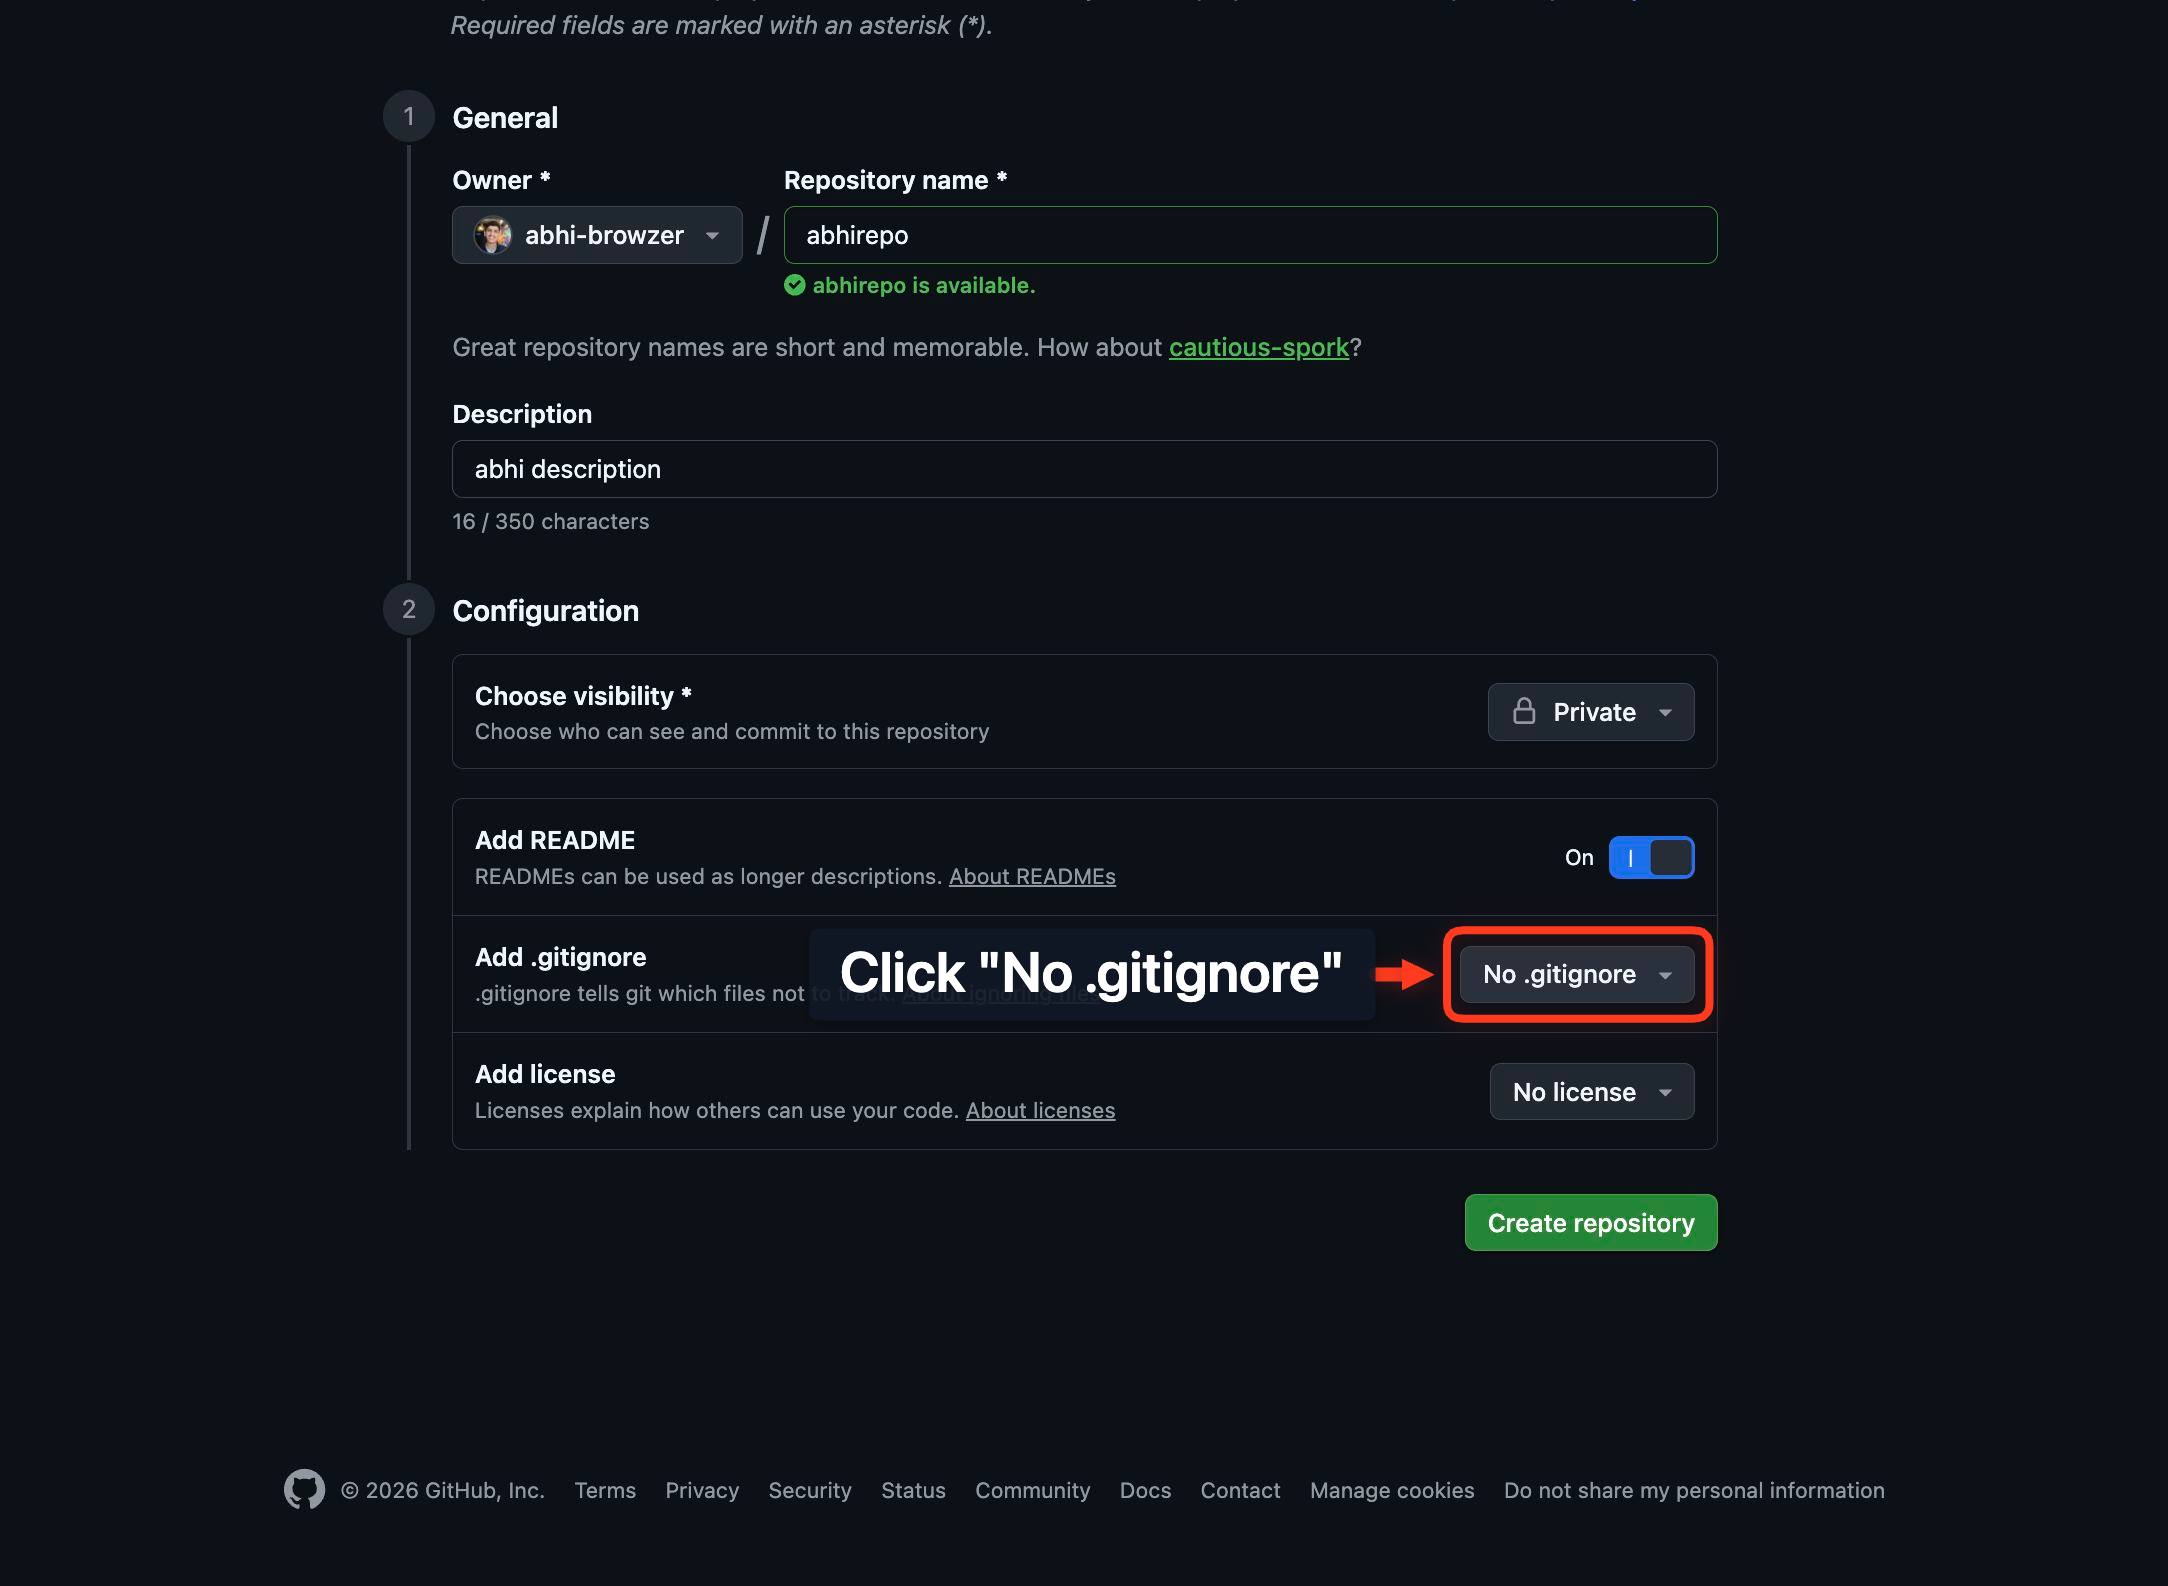
No .gitignoreClick the No .gitignore button to open options for selecting a .gitignore template. A .gitignore file specifies files and folders Git should ignore (e.g., node_modules, build artifacts, secret keys).
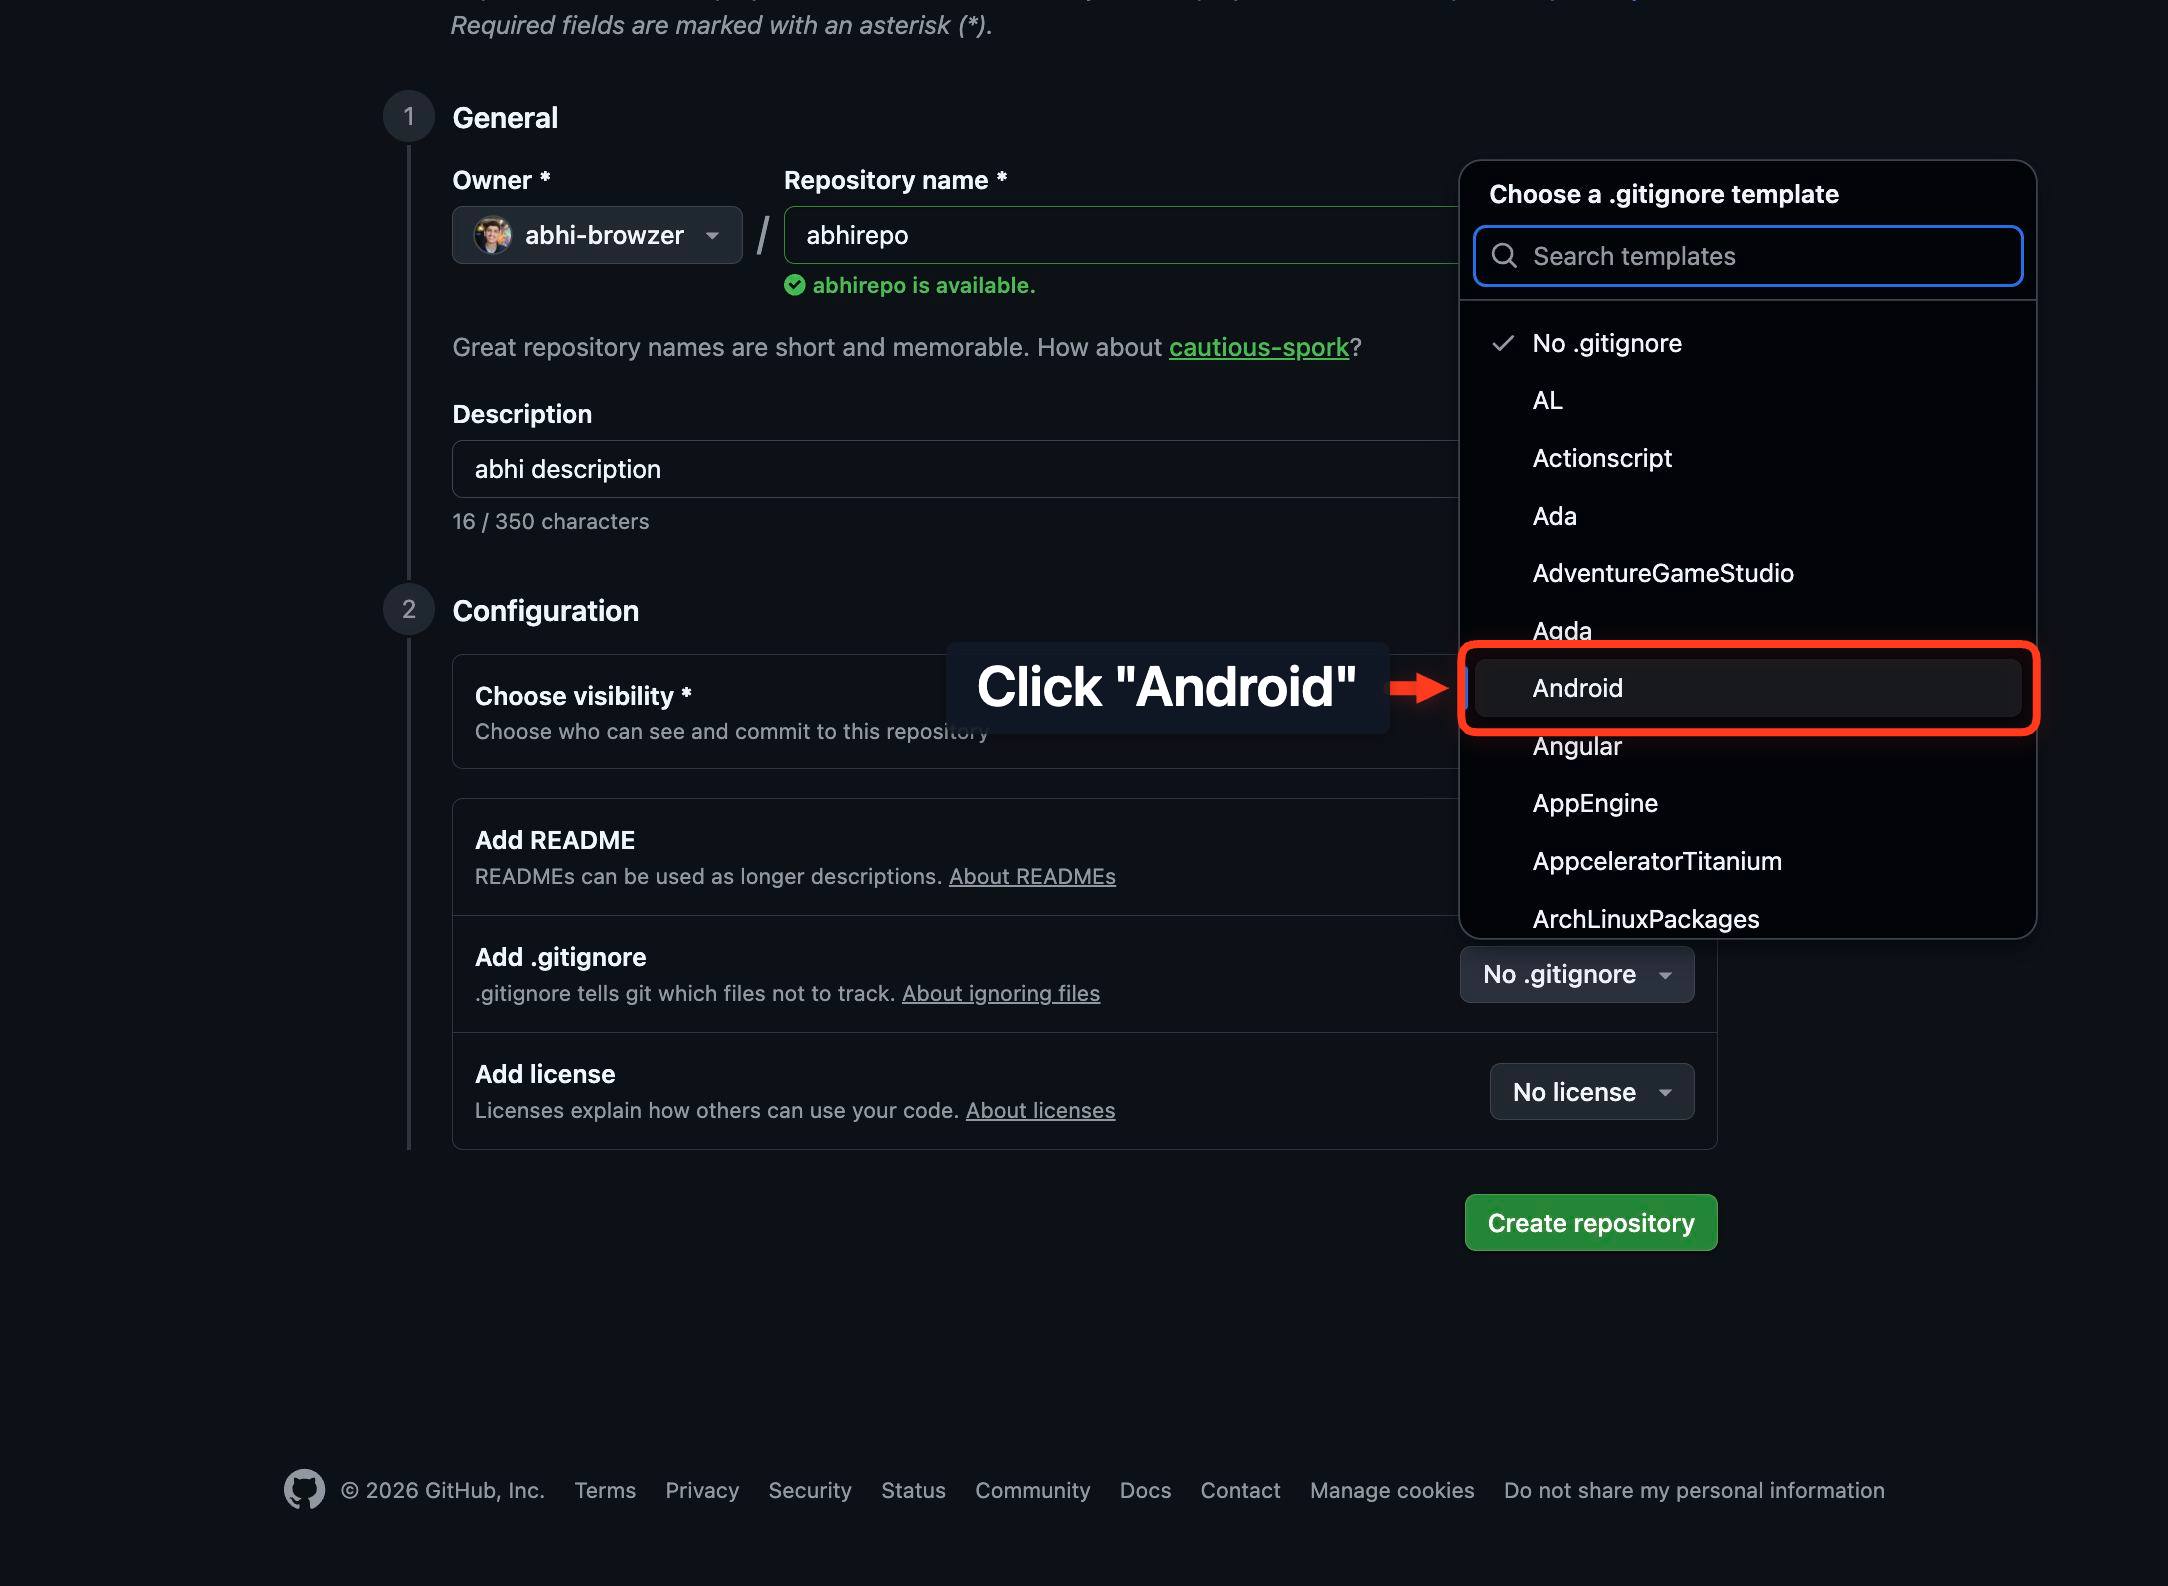
.gitignore template filterType in the .gitignore template filter combobox to search for a template matching your project type. For example, type 'Android' if you're building an Android app, 'Node' for Node.js, or 'Python' for Python projects.
AndroidClick the Android option from the dropdown to select the Android .gitignore template. This pre-populates your .gitignore file with rules for Android development (e.g., build files, IDE settings, emulator data).
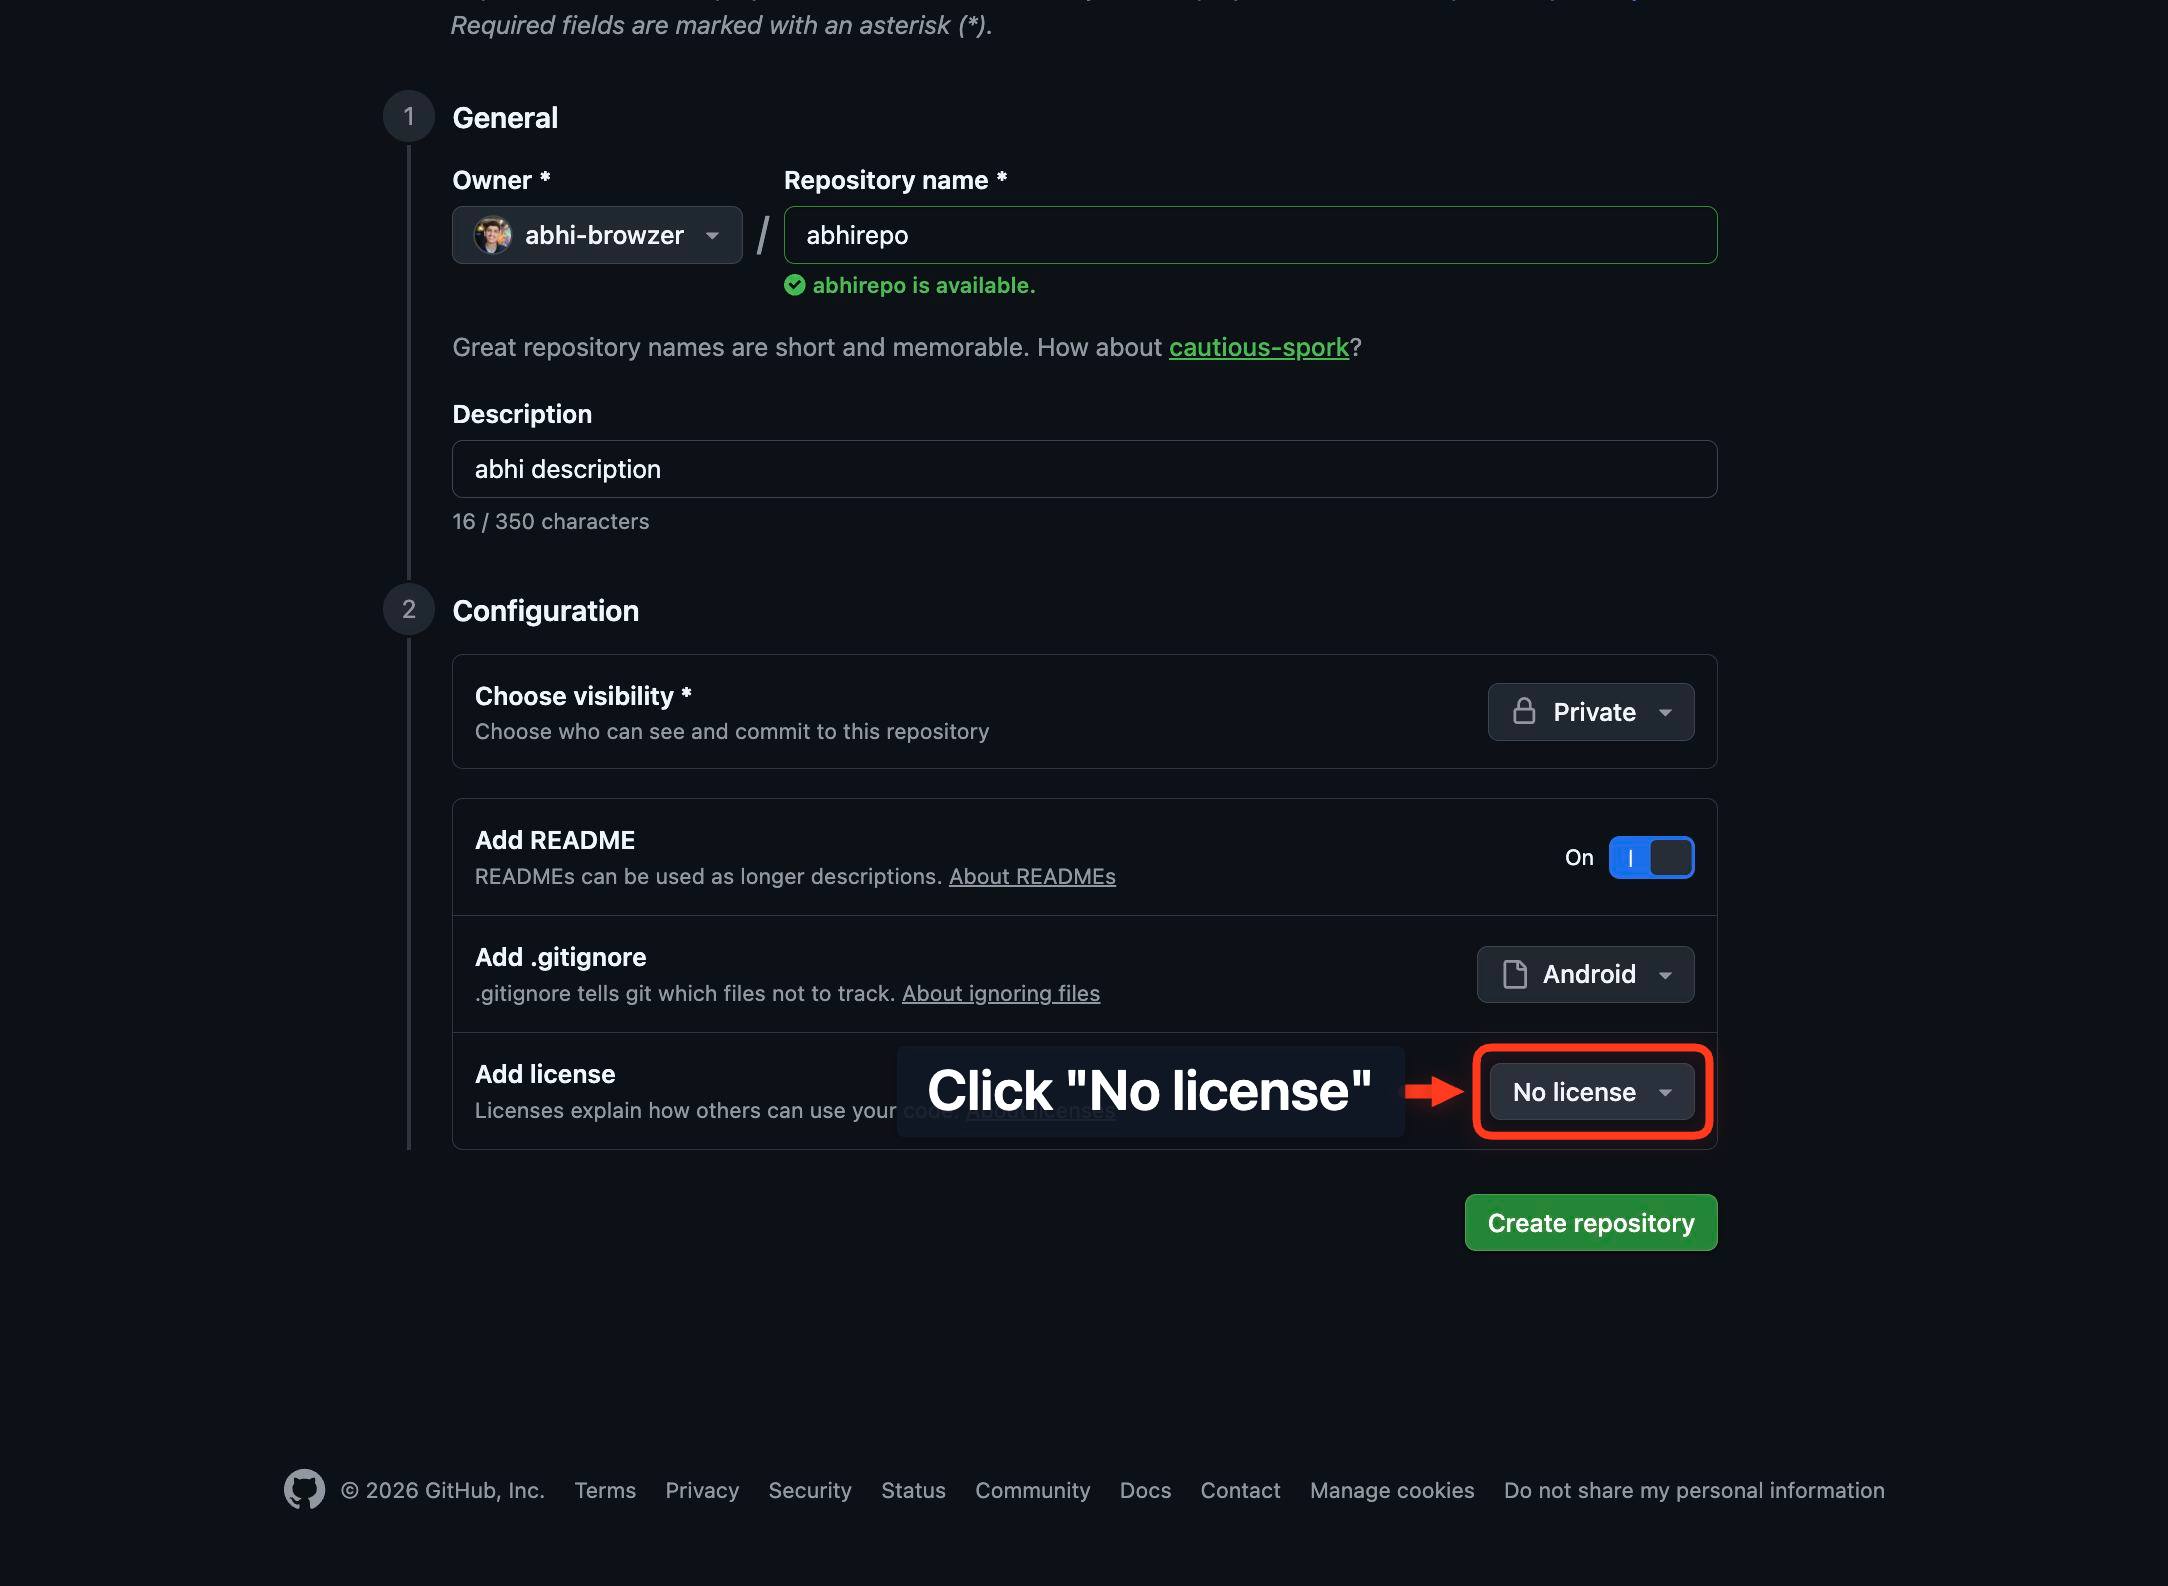
No licenseClick the No license button to open options for selecting a license. A license clarifies the terms under which others can use, modify, and distribute your code.
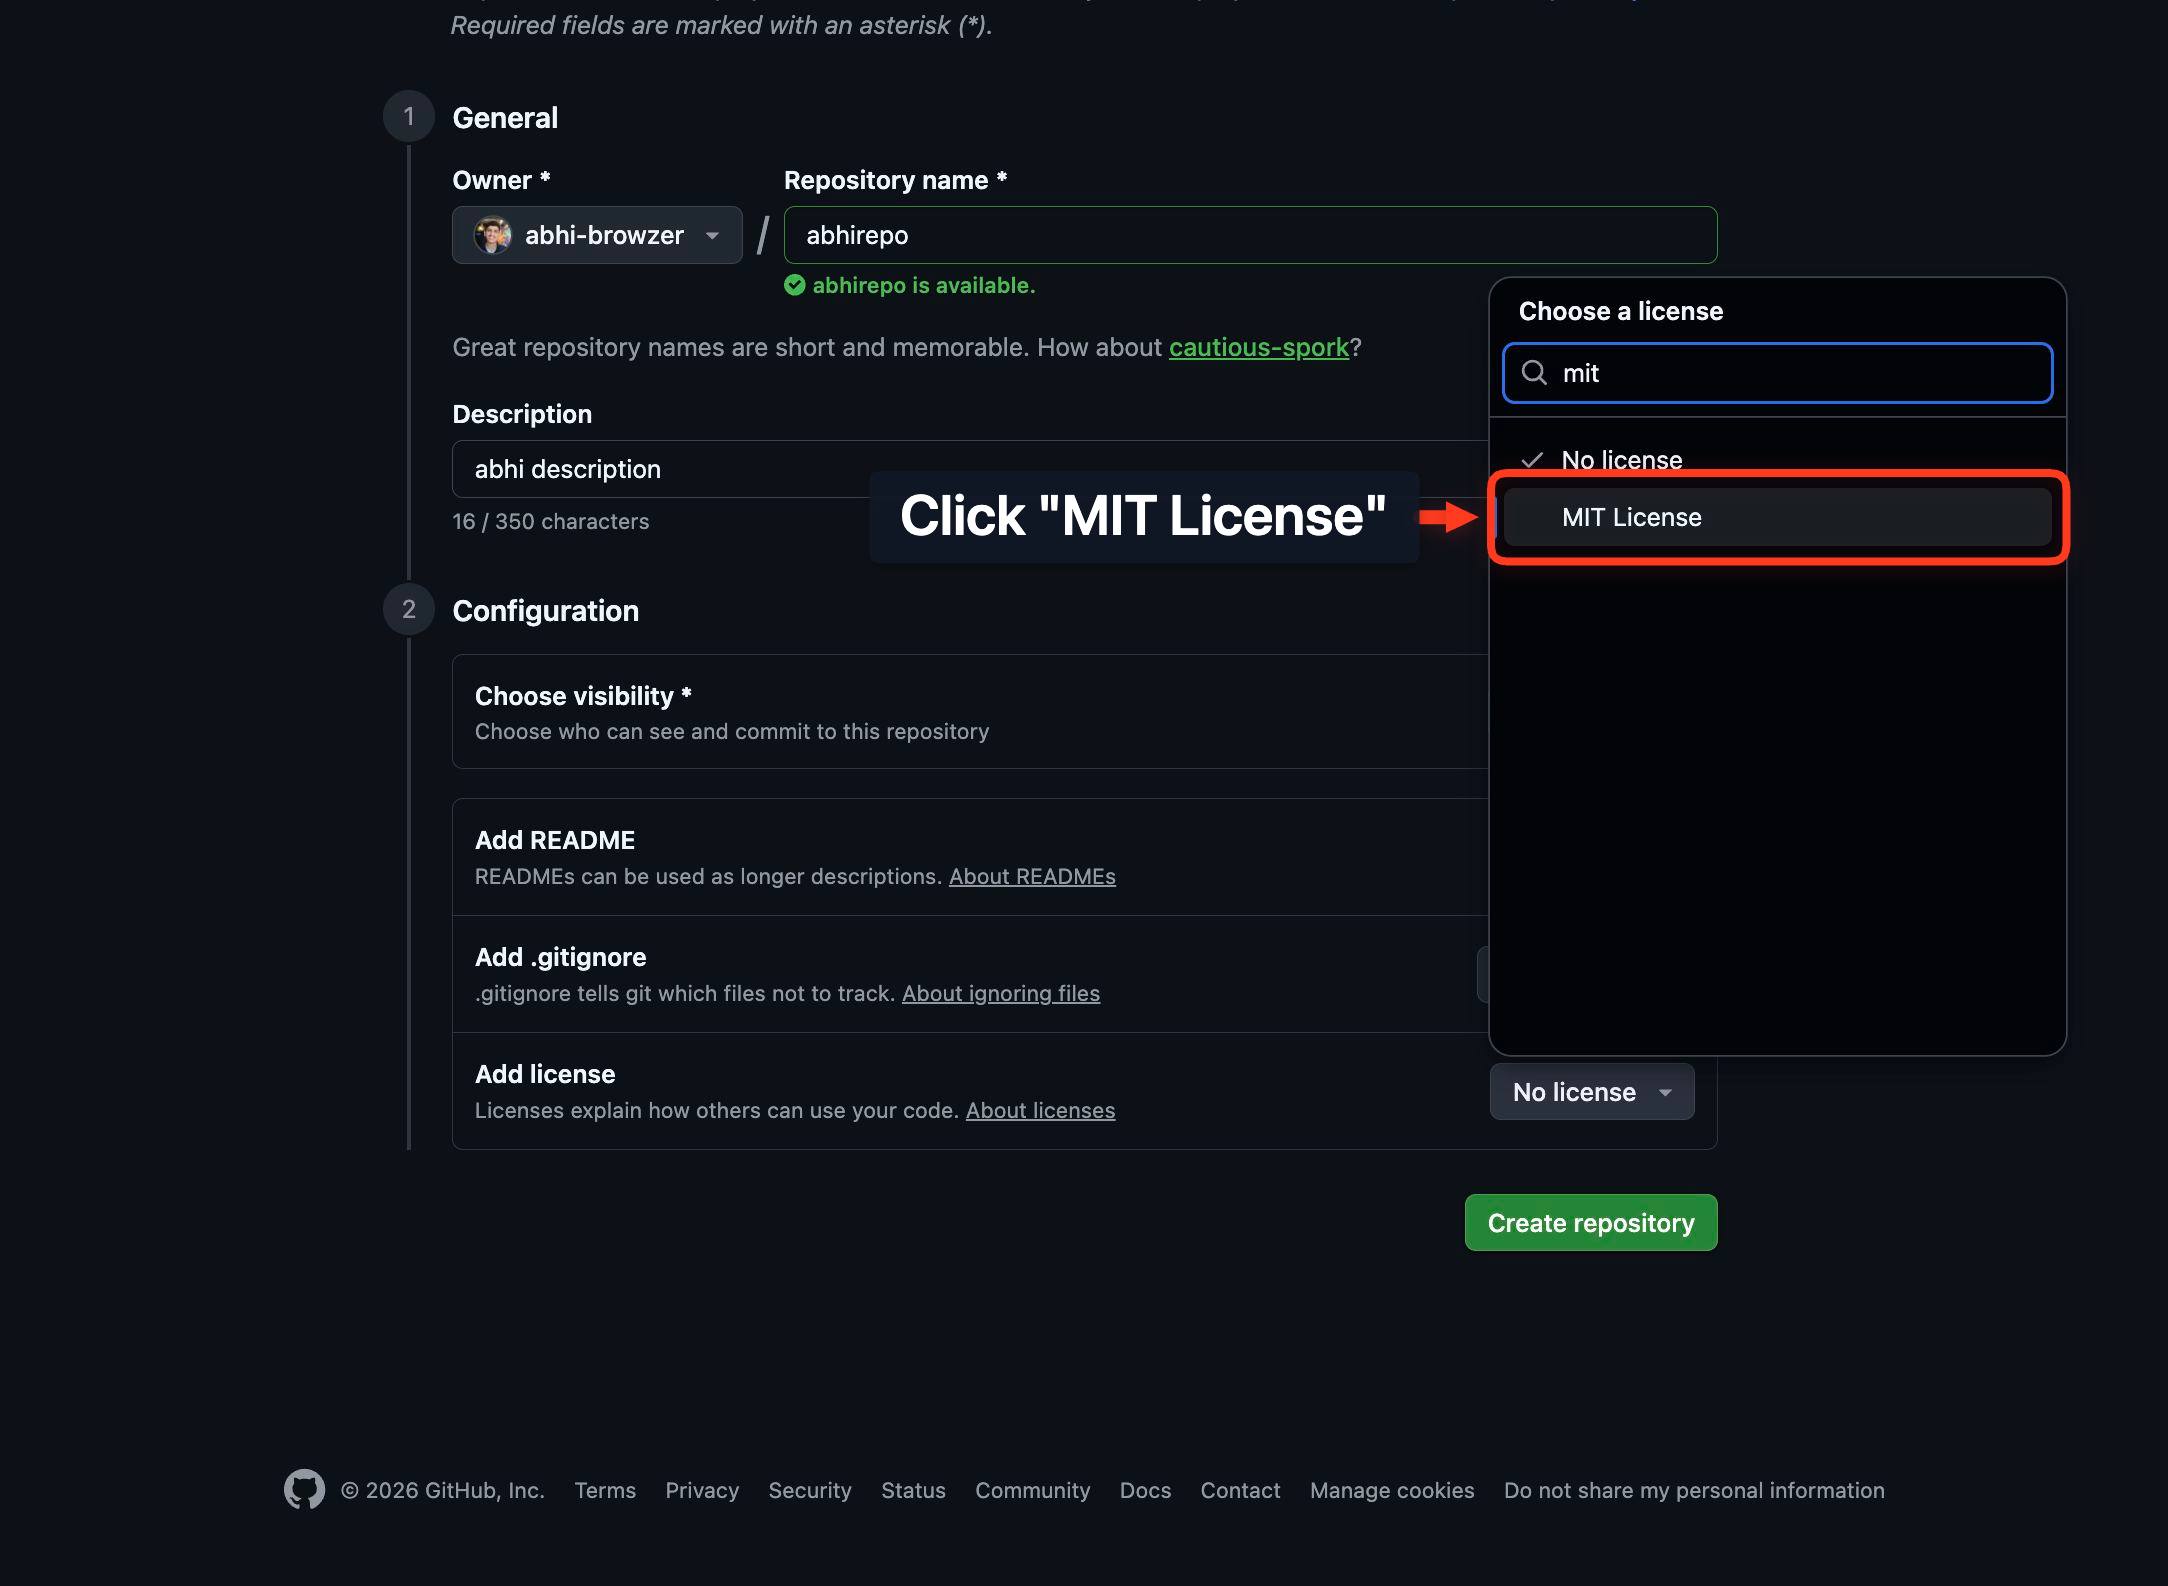
MIT LicenseClick the MIT License option to apply the MIT license to your repository. MIT is a permissive open-source license widely used in the software community, allowing others to use, modify, and distribute your code with minimal restrictions.
License filterType in the License filter combobox to refine your search if needed (this step may be used to confirm or adjust your license selection). The filter helps you find a specific license from GitHub's list.
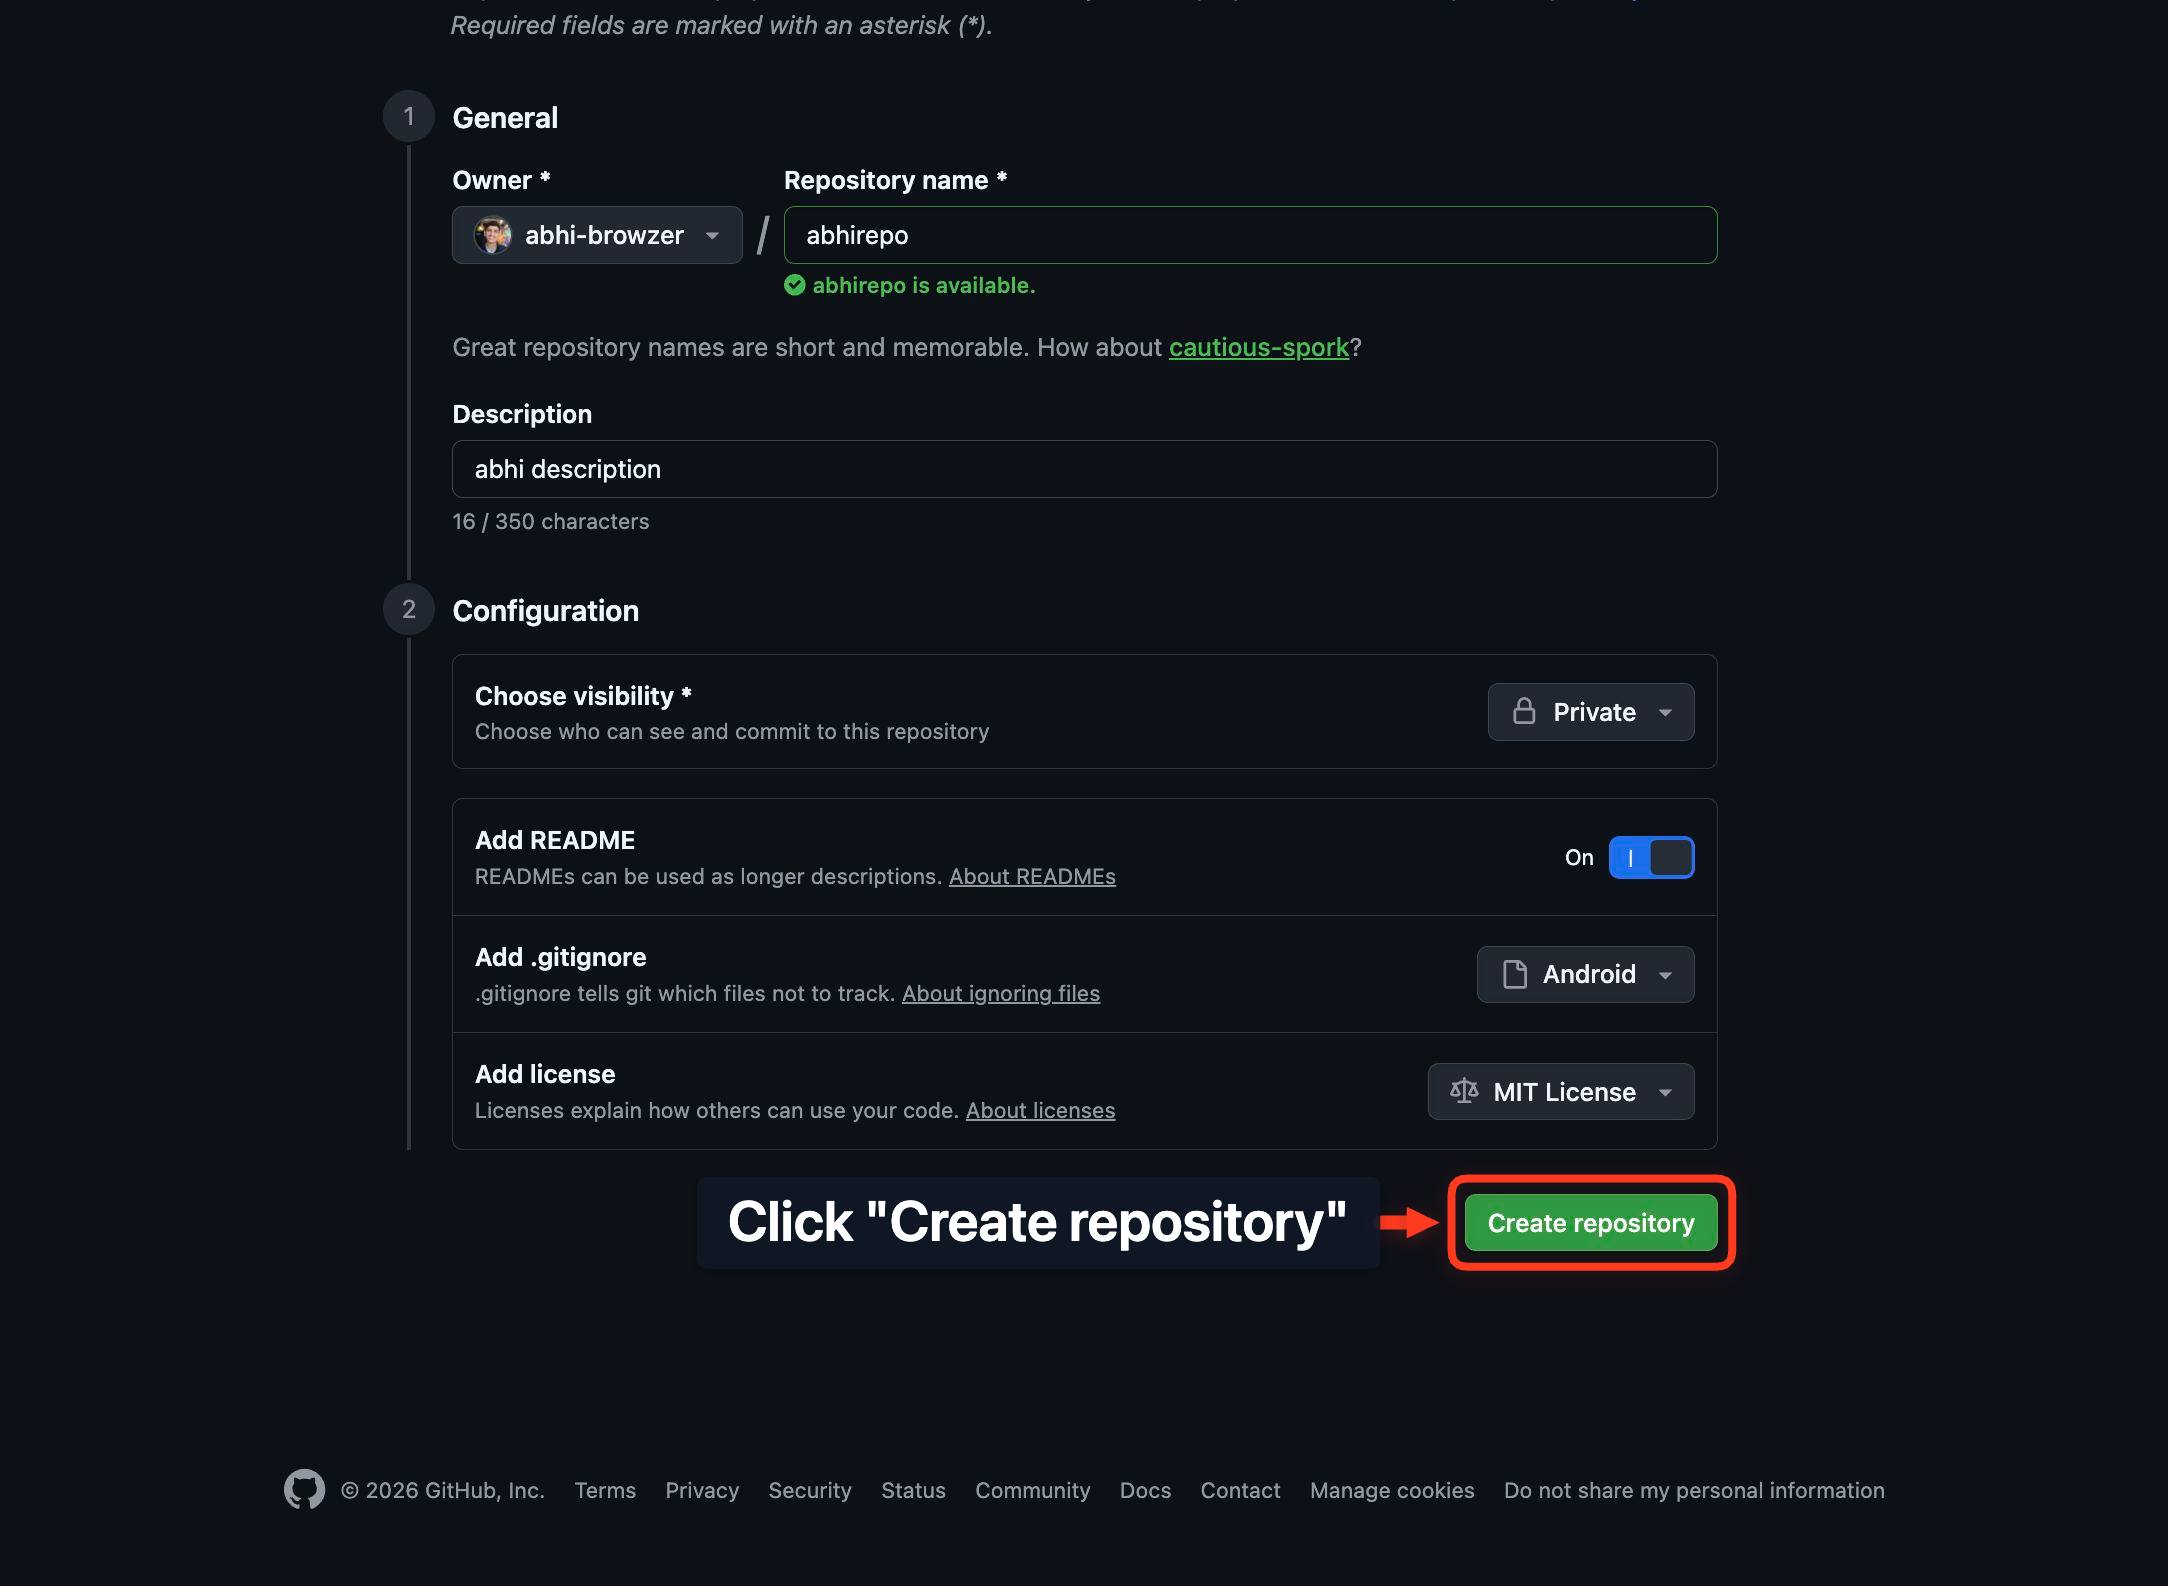
Create repositoryClick the Create repository button (a large green button at the bottom of the form) to finalize the creation of your repository with all selected settings.
The page navigates to your newly created repository on github.com. You are now viewing the repository's main page, which displays the README, file listing, and setup instructions.
Confirm it worked
- 1After creation, you are redirected to your new repository's main page (URL: https://github.com/[your-username]/[repo-name]).
- 2The repository name appears in the page header, and the description is displayed under the repo name.
- 3A README.md file is visible in the file listing (if you chose to add it).
- 4The .gitignore file (if selected) and License file (if selected) appear in the repository root.
Common issues
Keep reading
Creating a new repository - GitHub Docs
# Creating a new repository [...] You can create a new repository on your personal account or any organization where you have sufficient permissions. [...] > [!TIP] [...] > You can also create a repository using the GitHub CLI. For more information, see `gh repo create` in the GitHub CLI documentation. [...] ## Creating a new repository from the web UI [...] 1. In the upper-right corner of any page, select , then click New repository. [...] 10. Click Create repository. [...] | --- | --- | [...] &owner= [...] -corp` creates a [...] called "test-repo" owned by the [...] -corp" organization. | Any valid [...] name. Spaces [...] be replaced with [...] +` or `%20`. | [...] | `owner` | `https://github.com/new?owner=avocado-corp&visibility=public` creates a public repository owned by the "avocado-corp" organization. | Any valid organization name or username. Alternatively, while signed in use `@me` to specify your user account as the owner. | [...] | `https [...] ocado-corp
docs.github.comgh repo create - GitHub CLI
## gh repo create [...] ``` gh repo create [<name>] [flags] [...] Create a new GitHub repository. [...] To create a repository interactively, use`gh repo create` with no arguments. [...] To create a remote repository non-interactively, supply the repository name and one of`--public`,`--private`, or`--internal`. Pass`--clone` to clone the new repository locally. [...] `--add-readme` Add a README file to the new repository [...] Disable wiki in the new repository [...] t`,`--team ` The name of the organization team to be granted access`-p`,`--template ` Make the new repository based on a template repository [...] ``` # Create a repository interactively $ gh repo create [...] # Create a new remote repository and clone it locally $ gh repo create my-project --public --clone [...] repository in a different organization $ gh repo create my-org/my-project --public [...] # Create a remote repository from the current directory $ gh repo create my-project --private --source=. --remote=upstream
cli.github.com